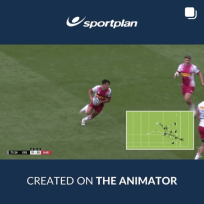
These plays are perfect for younger teams as they only require one set up with the 10 making the call as to who gets the ball
1000: 1000 is your basic switch move 10 runs cross fields and drops the ball behind to 12.
2000: 10 runs cross field, dummies to 12 and gives to 13
3000:10 runs cross field, dummies to 12 gives to 13 who gives an indide ball to 15.
for these plays 12 and 13 want to be almost flat with eachother but spread out at least 10-15m dependent on your 10s passing skills.
15 should be directly in between 13 and 13 plus 5m back.
1000 and in some cases 2000 are used as wrecking balls if you have giant centres so promoting ball carrying skills and contact work is advisable.
Communication is key. As you can probably imagine naming the plays "thousand" may create some confusion if players do not hear correctly. whether you wish to change the names of the plays to suit your team or you choose to incorporate some form of communication exercise or penalty for lack of communication is up to the coach.
In these plays the wingers do not get used so coaches must find a way to keep players interested while other are learning the play. this could involve having all players learn these plays despite playing out of position.

in more ways than one
 sportplan_netball


in more ways than one
sportplan_rugby

Long, lonely runs build lungs, not rugby players. Here's how to build a pre-season that puts fitness where the game needs it - with a ball in hand and a decision to make.
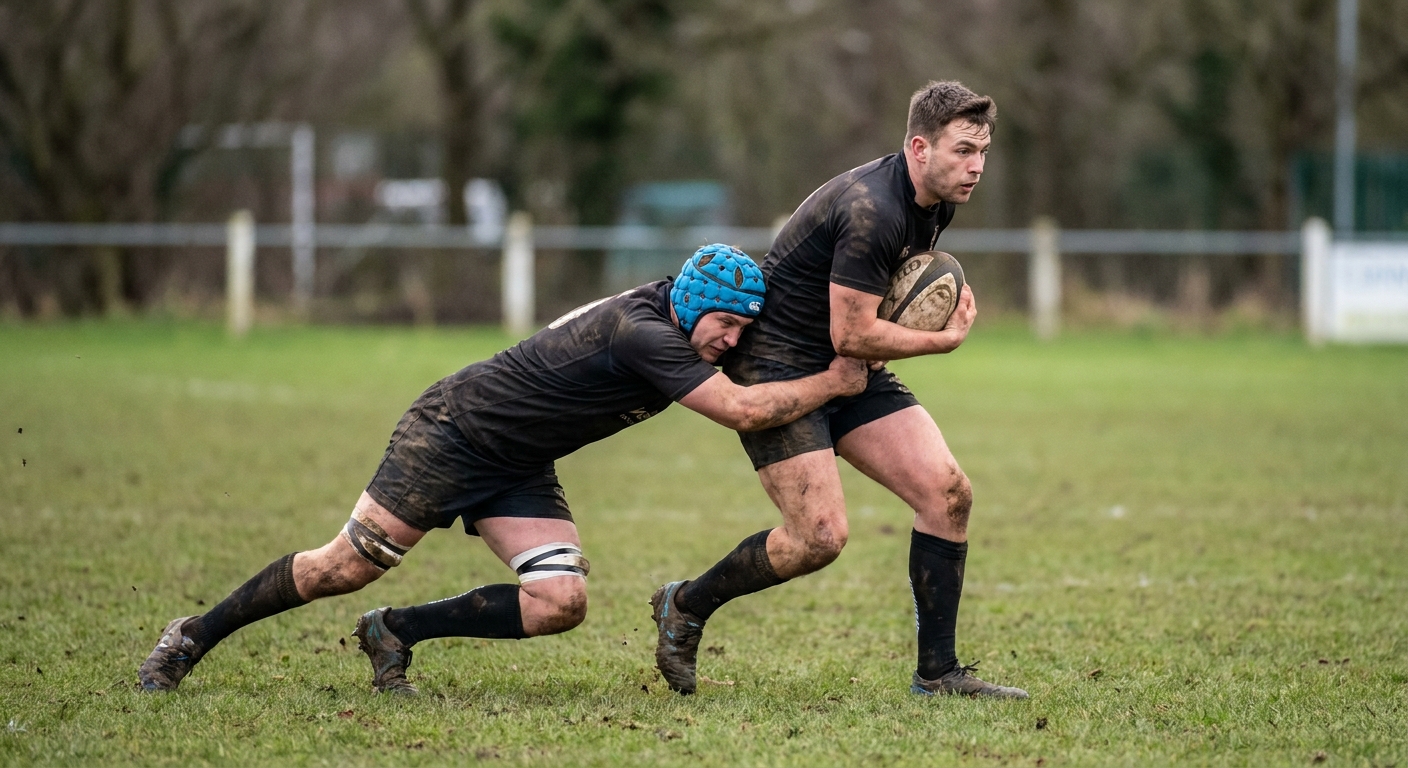
After a long summer off, throwing players straight into full-blooded tackling is asking for trouble. Here's a graduated, welfare-led way to rebuild collision tolerance in pre-season.

Restart kicks are now the most common set-piece in rugby and the easiest to lose. Treat them like a lineout: prepare options, drill the catch, and own the reception.