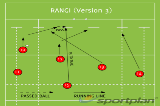
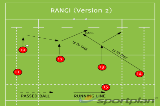
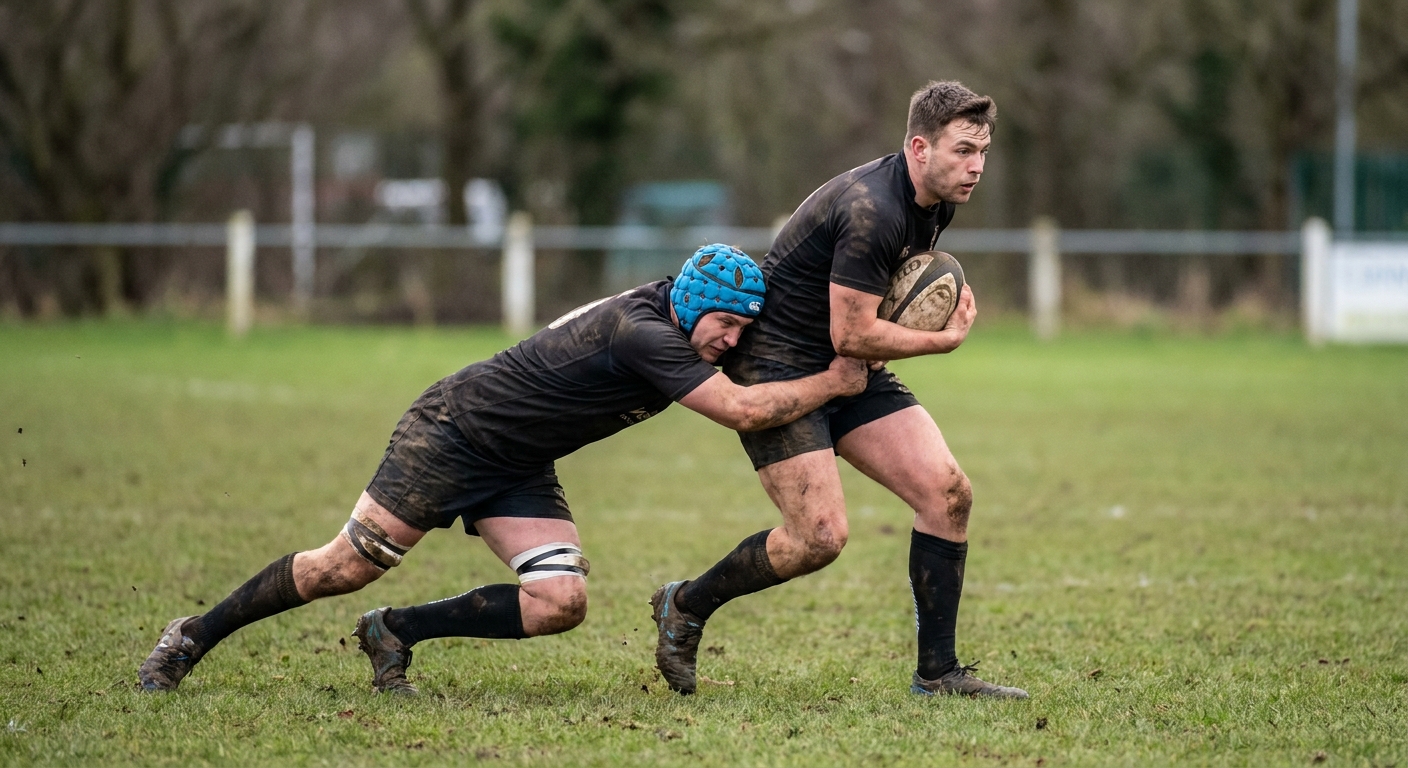
5 players start on a straight line of cones about 5m apart. 10m away there are 5 more cones. Two of the 5 cones are blue, and two are red, and the middle cone is orange. The player on the orange cone never defends, he always attacks and always starts with the ball in hand.
The coach shouts a colour and the players who are standing on those cones must run forward and touch the cone 10m away from them. It will always be 2 defenders, but their positions will slightly vary. Once the first defending player has touched the furthest cone across from where he started the orange player can initiate attack. The orange player will have 2 supporters, one either side of him.
The ball carrier should look to attack the "Mid-Space" i.e. the space between the 2 defenders, as hard as he possibly can. This will cause at least one of the defenders to move in towards him, and therefore open up space for the supporter.
You will notice as the drill goes on, if the ball carrier runs at this space hard enough, the defenders are sometimes caught in two minds of "its your man" and the attacker will glide straight through the gap, but only if he is explosive from the word go!!

in more ways than one
 sportplan_netball


in more ways than one
sportplan_rugby

Long, lonely runs build lungs, not rugby players. Here's how to build a pre-season that puts fitness where the game needs it - with a ball in hand and a decision to make.
After a long summer off, throwing players straight into full-blooded tackling is asking for trouble. Here's a graduated, welfare-led way to rebuild collision tolerance in pre-season.

Restart kicks are now the most common set-piece in rugby and the easiest to lose. Treat them like a lineout: prepare options, drill the catch, and own the reception.