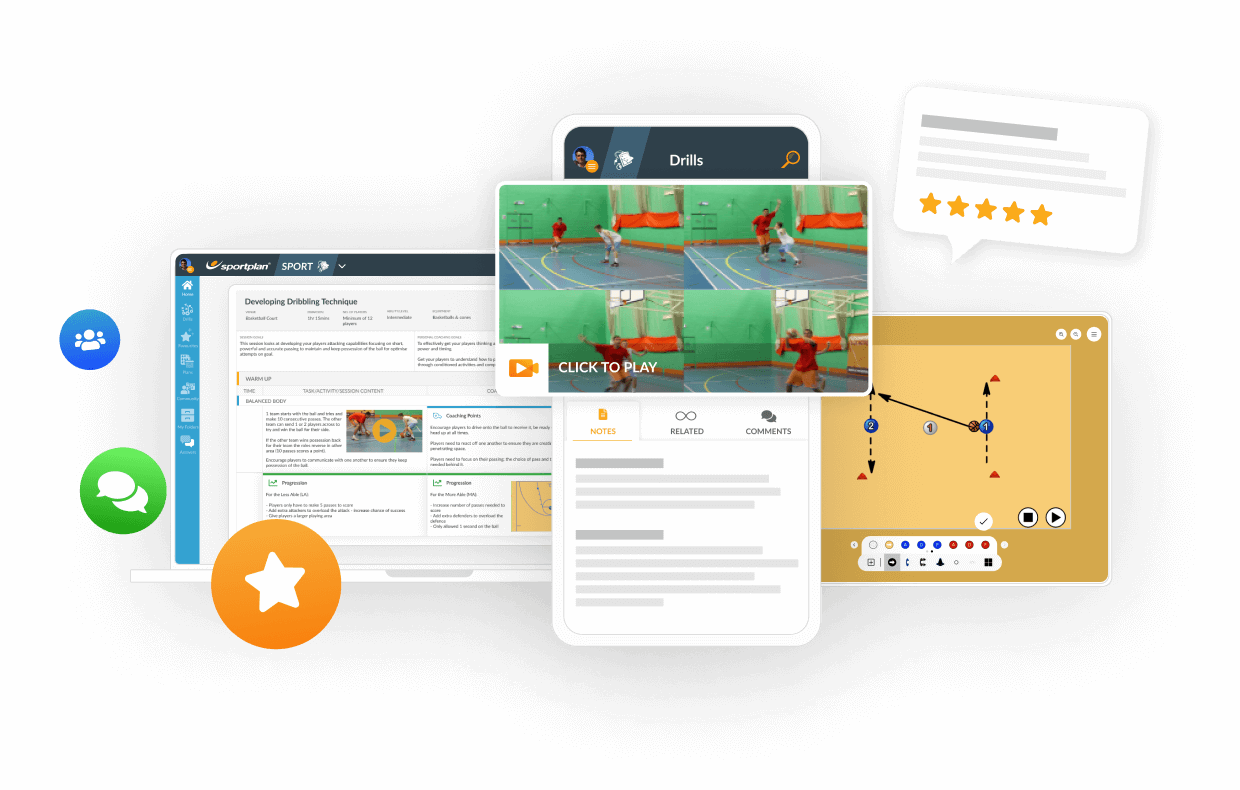
From low cone RED cuts to baseline and goes across the key to opposite side of the court
RED performs a hard cut back to BLUE
BLUE passes to RED
RED performs proper pivot or landing to square to the basket and takes a shot from near elbow
BLUE follows shot for the rebound immediately after the pass
RED clears to fill at high cone on opposite side of the court from where they started
BLUE gets rebound, passes to YELLOW (high cone on opposite side of the court from where they started) then fills at the low cone on that side of the court
NOTE: GREY (Next player on the low cone opposite the ball now on the weak side) immediately cuts along baseline as soon as BLUE has secured the rebound.
Cutting hard through the key and then back to the ball
Landing on two feet then performing inside foot pivot to square to the basket for a proper jump shot
OR
Performing mid air twist while receiving the ball to land already square to the basket for an immediate jump shot
Good spacing is only the start. The best modern offences teach players to attack the defence's rotations and play in a permanent 4-on-3 - here is how to coach that read.

The ball screen produces almost half of all professional offensive possessions, yet most teams still teach it as a memorised play. The modern approach trains the read - giving players a framework to decide based on what the defence does, not what the coach called.
The closeout is the most repeated defensive action in modern basketball. With fouls per game climbing in the 2025-26 season, coaches must teach defenders to contest the three without surrendering the drive or putting shooters on the line.


Register for FREE and get coaching tips, top drills, session and more every week!